Pre-requisites for Synology NAS server users
- First of all to get a trusted certificate you need to own a domain name which can be assigned to your Synology DDNS service since the SSL certificates offered on our web-site can only be issued for FQDN (fully qualified domain name), (the DDNS service is offered for free for Synology users on https://myds.synology.com);
- Setup your DDNS service before you go to the next step;
- Then a CNAME DNS forward from the domain or subdomain (yourdomain.com) to the DDNS service (such as name.synology.me) should be added.
- Please make sure Port Forwarding has been configured on his router.
Here is a quick guide below:
Log in to your cPanel and find the 'Domains' box and then click on Advanced DNS Zone Editor.

Under 'Add a Record' fill in each box with your own information. There should be a domain name in the

CSR code generation:
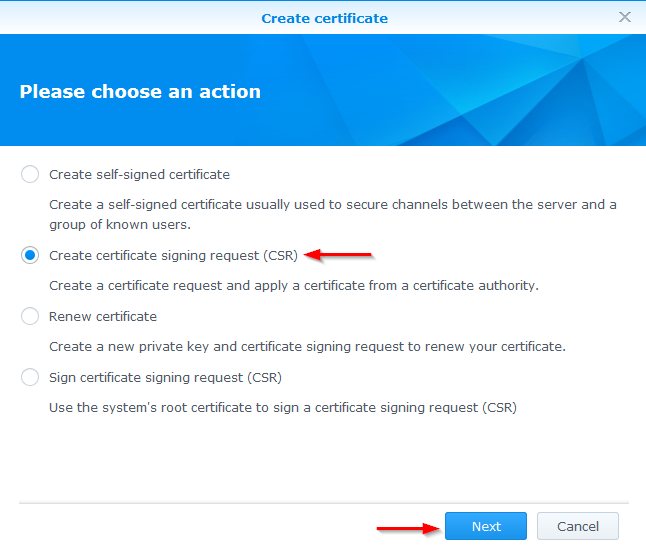
- Log in to Synology and navigate to Control Panel > Security > Certificate and click on 'Create Certificate'.

- Select 'Create certificate signing request (CSR)' and click 'Next'.

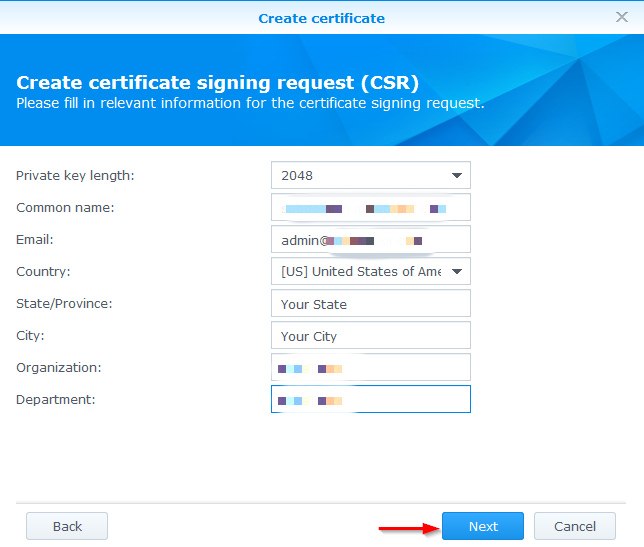
- Now fill out the request form with personal information:
Private Key Length: 2048;
Common Name: Enter the domain name (or subdomain) in question;
Email: Enter email address;
Country, State, City - please specify the details of the company the certificate will be issued for -your company name;
Organization -your company name;
Department - company division (sales, IT, security, media etc. you can specify NA if nothing else comes up).Once the form has been completely filled out click on 'Next'.

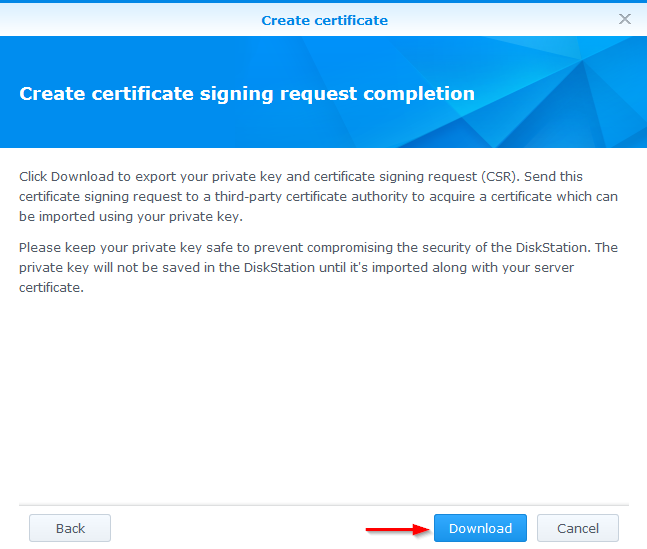
- Now click on 'Download'. This will download a file called archive.zip which will contain two files: server.csr and server.key - these files should be backed up.

Once the CSR code is generated you can start the SSL activation process in ZTABOX.
After the SSL activation and validation processes are completed you will receive an email with certificate files from the Certificate Authority and will be able to Install the certificate on your Synology NAS.
