
To generate a new certificate signing request using IIS 10 control panel, follow the steps below:
1) Start Internet Information Services (IIS) Manager by entering 'inetmgr' into the search field near Start button or in the Run window, which can be launched by pressing the Win+R hotkey.
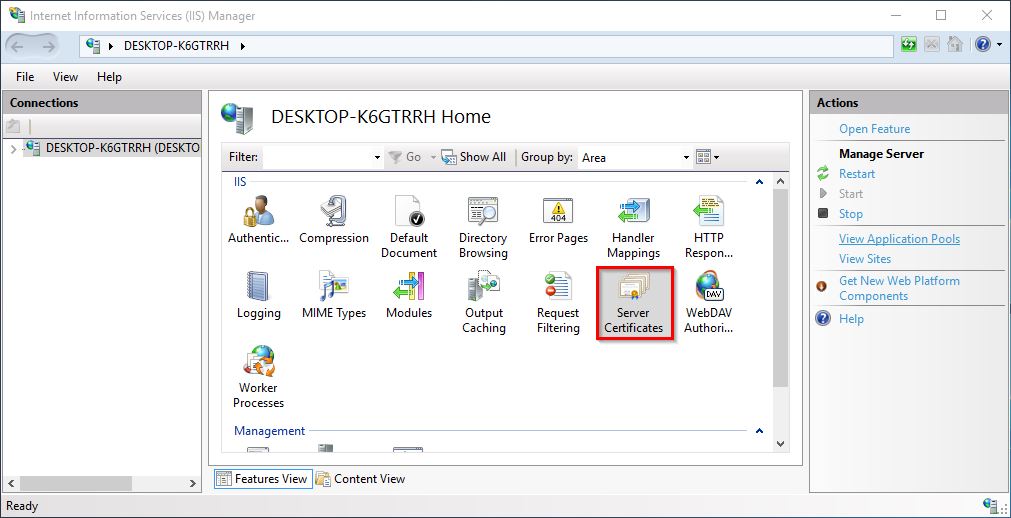
2) Double-click on the Server Certificates icon at the IIS Manager's home page.
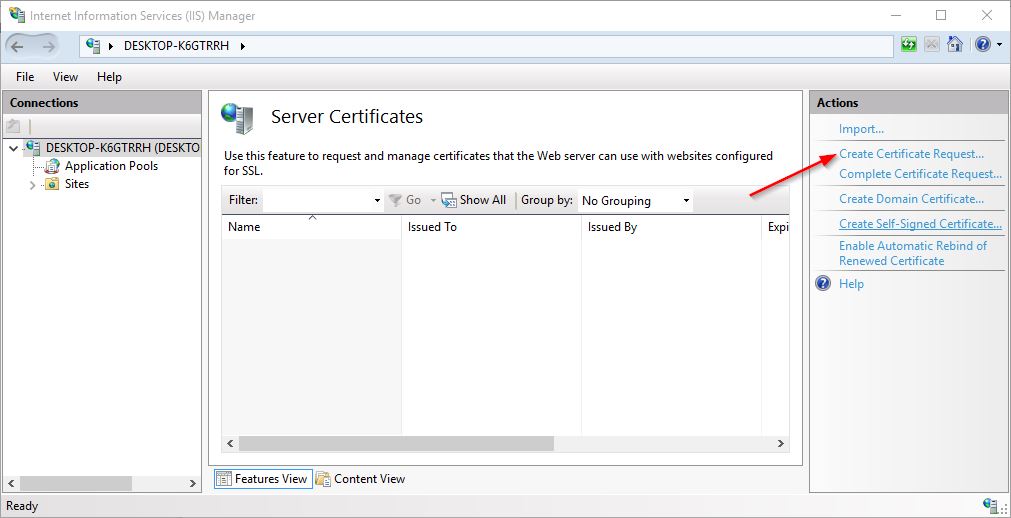
3) Hover the mouse over the Actions panel on the right side of the window and click Create Certificate Request....
4) In the next window - Distinguished Name Properties - complete all of the fields with the corresponding information. A brief description of each field is provided below.
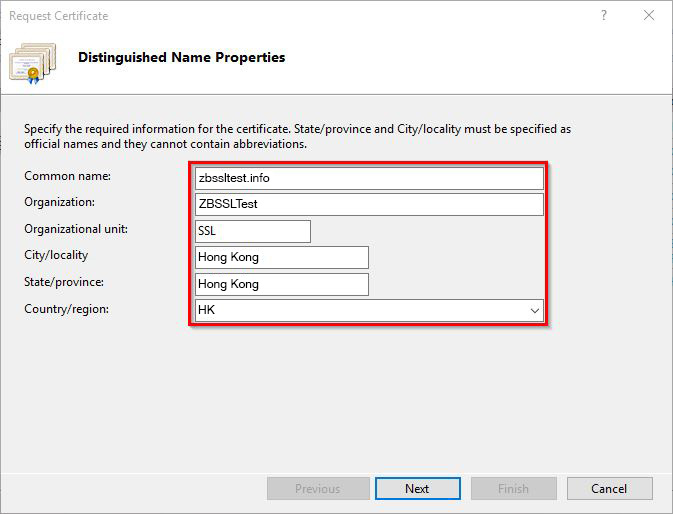
5) Information to be specified in each field:
- Common name - a fully qualified domain name (e.g. domain.com or sub.domain.com) which is intended to be secured with the SSL certificate;
- Organization - a company's name should be specified in this field. If there is no company owner of a domain name, enter 'NA'. This field cannot be left blank.
- Organization unit - the department in charge of SSL certificate issuance and installation. You may enter 'IT', 'Security' or simply 'NA' if no department is specified. This field cannot be left blank.
- City/locality - your city name.
- State/province - your state or province. You may re-enter your city name in this field if your country has no states or regional identifiers.
- Country/region - Select the 2-digit country code from the drop-down list.
Important: For OV and EV certificates, you must specify a legal company name and an existing department in the Organization and Organization unit fields since these certificates are issued to registered companies and require more advanced validation.
Note: All the fields should contain alphanumeric symbols (Aa-Zz, 0-9) only. Special characters ('&”, '/', '^', etc.) are not allowed.
6) When all fields are filled in, click Next.
7) There will be 2 parameters shown on the next screen - Cryptographic Service Provider Properties:
- Cryptographic Service Provider - this should be left as the default selection Microsoft RSA SChannel Cryptographic Provider, as RSA keys are now considered industry standard.
- Bit Length - this field allows you to choose the length of a Private key, based on which CSR code will be generated. A certificate's encryption strength relies on the length of the Private key, therefore key length must be at least 2048-bit or higher (in accordance with Comodo (now Sectigo) Certificate Authority restrictions).
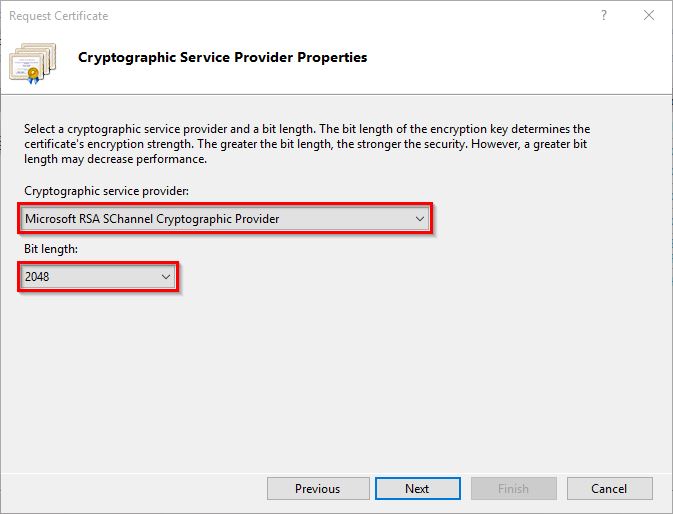
8) Once the key length is chosen from the drop-down menu, click Next to proceed.
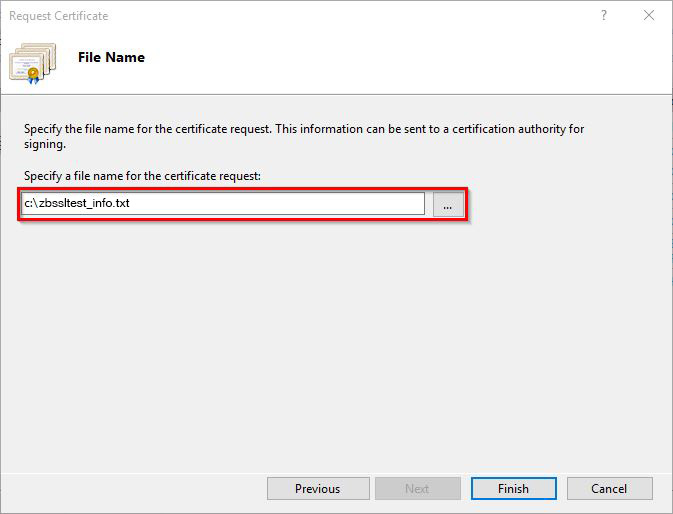
9) On the last page - File Name- specify a full path to the file, to which the generated CSR code will be saved; or browse the file directory by selecting ... (more) on the right, and then click Finish.
Note: If you type in the path to the file manually, make sure that the directory to which you are planning to save the file was created before this step. If the path leads to a non-existent folder, you will see an error message that the directory was not found.
10) Now you may activate the certificate with the CSR code, which was saved in the created file. This can be opened using any text editor.
Once the SSL certificate is issued, it can be installed by following the instructions in this manual.